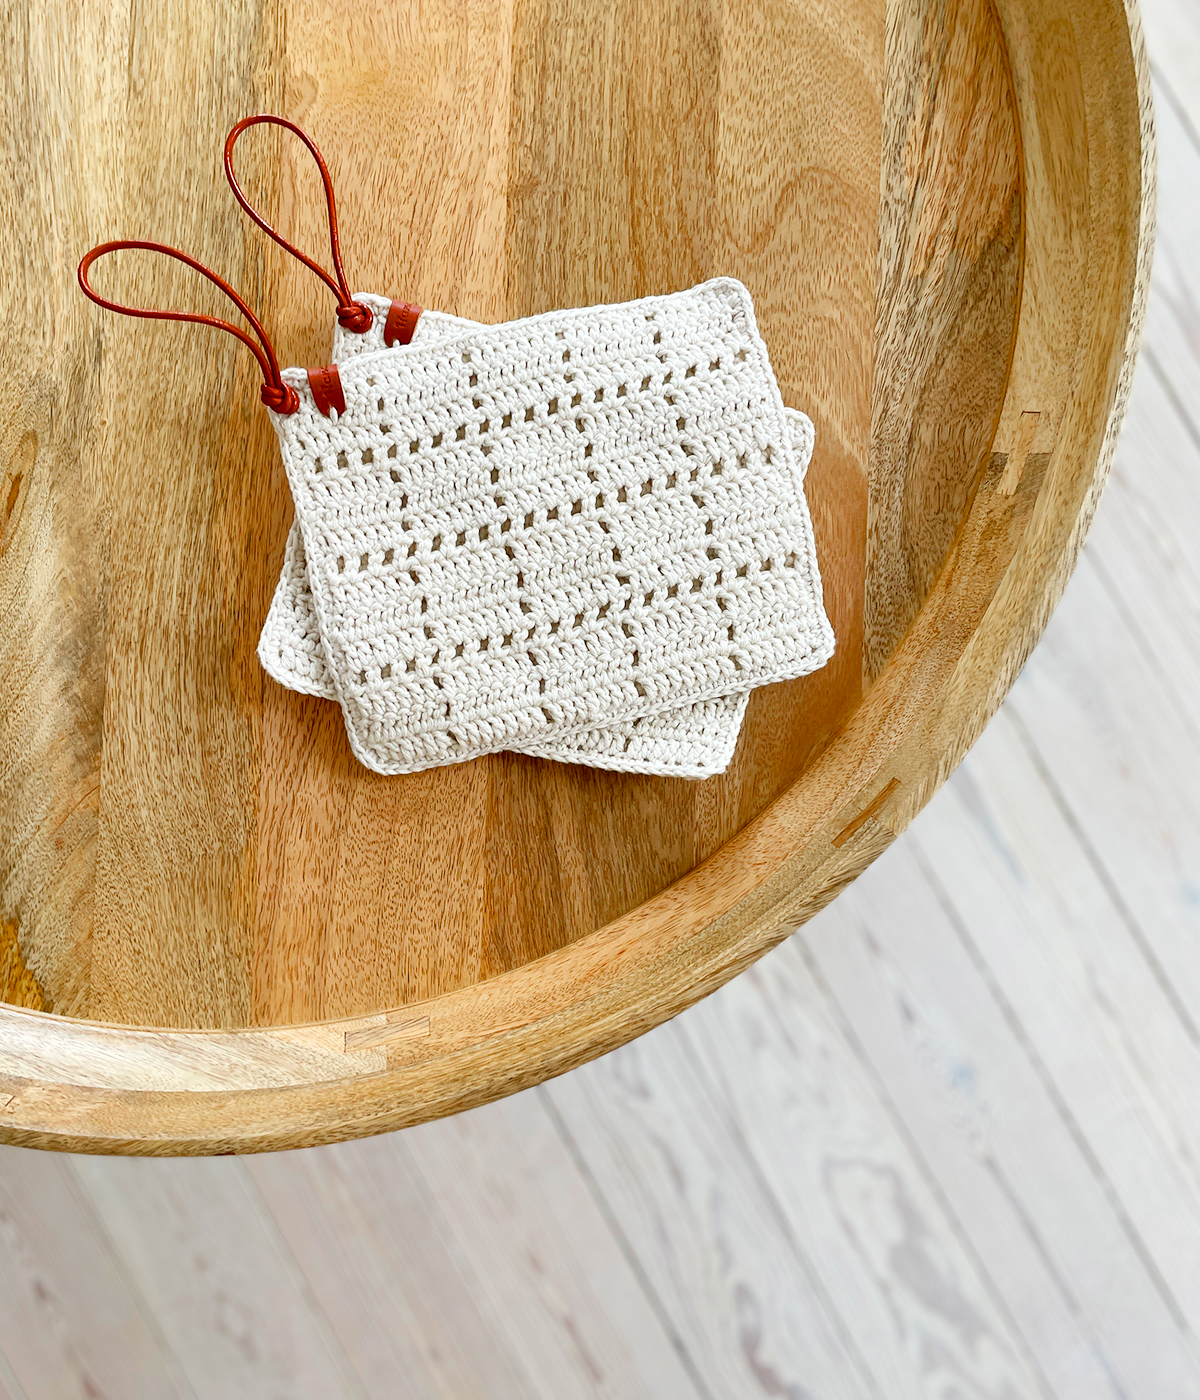
About the Chef’s Potholder
The very best sister-in-law Malene told me one day, that she had used the pattern from Chef’s Dishcloth for a set of potholders. My first thought was, that you can’t do that, with all those holes! When I saw them, I fell completely in love! 😍
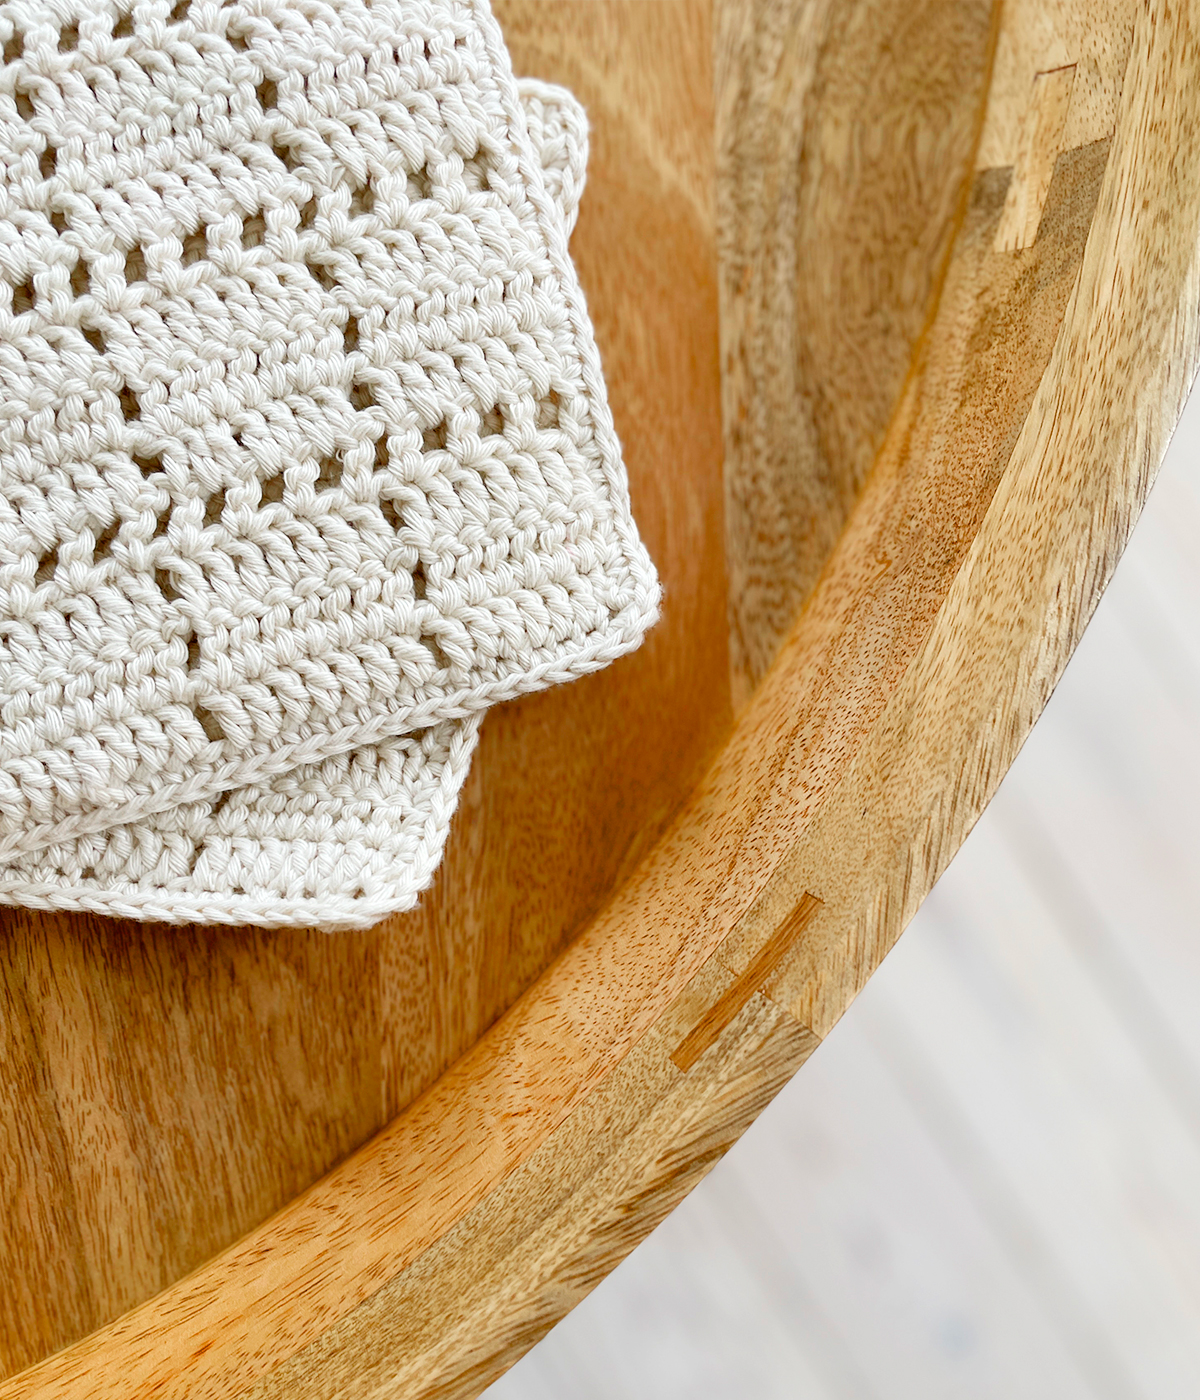
I love filet crochet and the style of it. Now it can be used on potholders too – yay! Instead of light forming the pattern, this is the shadow. You should not be afraid of whether they are then thick enough. The back is pure single crochet and the holes are quite small. They are crocheted in a thicker cotton yarn, and have a front and back, so they are thick enough 👌👏
She’s good, that Malene ❤️😍
(Scroll down for the free version on the page here)
Time to produce: 2,5 hours
Skill level: Easy
Size: 20 x 17 cm
For this pattern on the Chef’s Potholder, you need to be able to make chains, single crochet and double crochet, so it’s not that demanding. Click on the links here or scroll down to the bottom.
What you need
I absolutely love this color: Drops Paris (cotton, 8/8) in this natural white color (No. 17). It’s a bit off-white, which makes the leather parts look so nice. It may not be so practical, but can be washed at 60 degrees, so everything can be saved 💪😁
Tools
Materials
By the whole KIT here in Drops Paris!
Before you get started
There is a special technique you need to use, when turning the work to get the perfectly straight edges. I call it “Pretty Turning (pt)“. You can of course choose to turn the piece in your usual way, but I would recommend you to try this, because it will be quite nice.

Step 1
When you have reached the end of the row, turn around without making turning stitches.
(At the chain in the very beginning, you use a turning chain – otherwise it’s impossible to get the first single crochet in.)

Step 2
Pull a little in the loop, and make a single crochet in the first stitch.

Step 3
On top of that single crochet, you make another: Insert the hook in the back loop of the two loops from the first single crochet and make a single crochet in it.

Step 4
You have now made 2 stitches with the Pretty Turning = 2 pt. This counts as your first stitch 🙂
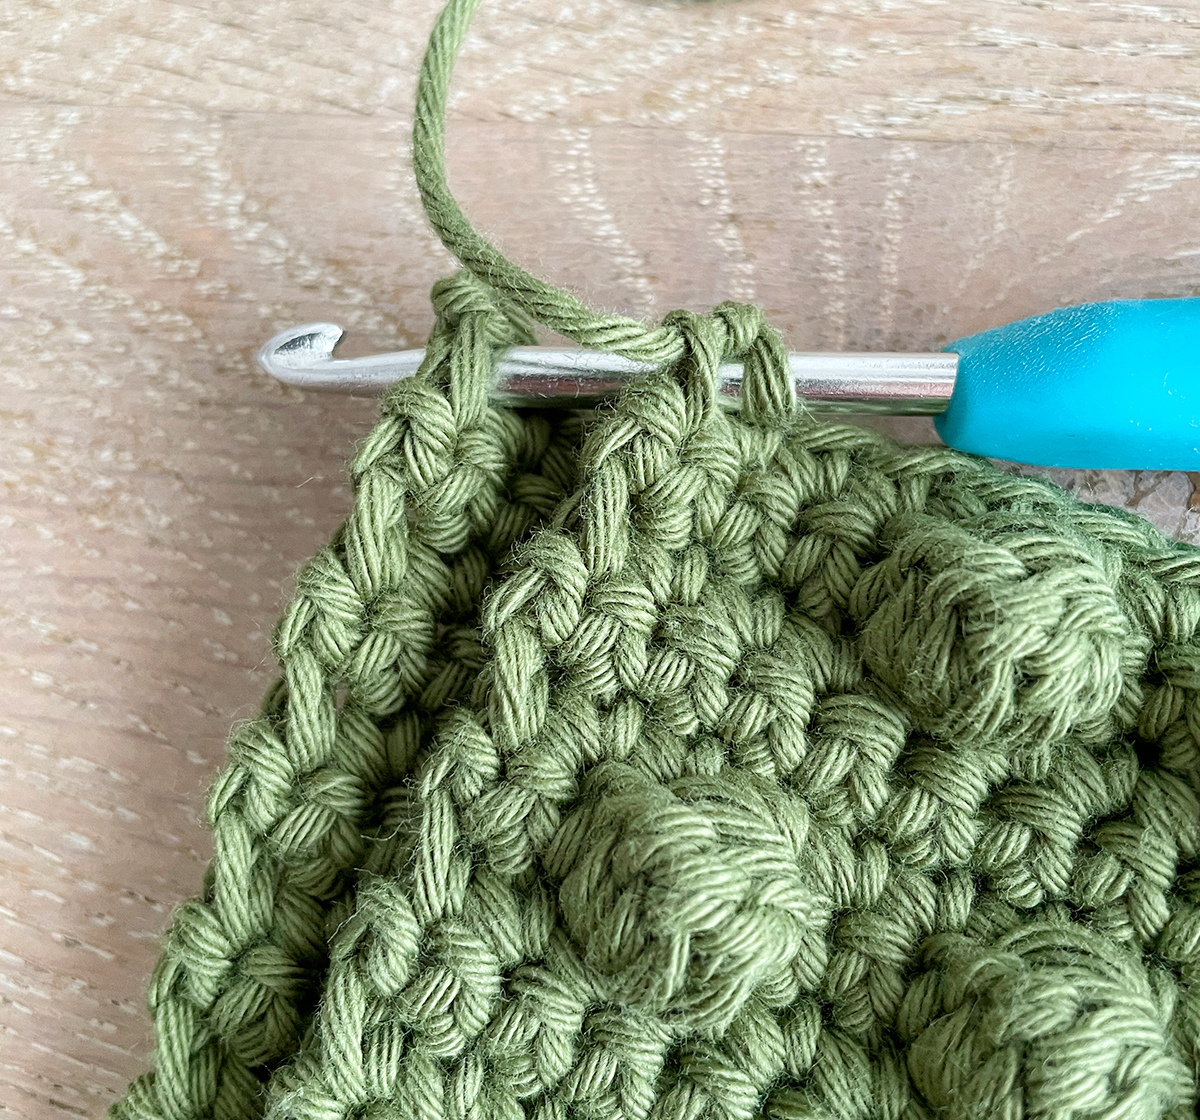
The holes in the pattern
The holes in the pattern
The holes in the pattern appear by making a chain and skipping a stitch. When you have to crochet on top of the chain (where there is a hole), you crochet around the entire chain – insert crochet hook into the hol,e that has come, and take the yarn back. That’s how you get a nice hole …
(Parantheses) og commas,
(Parantheses) og commas,
When you crochet according to the pattern, there are some different characters you use, so you avoid huge lines. Here I use commas “,” and parentheses “()”.
- At a comma: What stands between commas, you just do as it says.
- At parentheses: What is in between parentheses must be multiplied by the number of times that follows.
If you are new to patterns, then it’s explained here with an example:
EXAMPLE ROW (A, B) 2 times, C, turn
This means:
A, B, A, B, C, turn
Støt Milla Billa
Hvis du finder glæde ved mine opskrifter og og kan bruge mit indhold, kan du støtte op om Milla Billa lige her – så kan jeg blive ved med at lave skønt indhold til dig. Læs mere om, hvorfor de gratis opskrifter er så vigtige for mig, ved at klikke herunder.
På forhånd mange tusinde tak 🙏❤️🤗


Pattern

The back piece
On the Chef’s Potholder, you start with the back, as you crochet them together from the front, when it is finished.
(Turning stitch: Do not crochet in it again, but just use it to get up on the next row).
Start: Use hook 3.5 mm and chain 35 + 1 tch and turn.
ROW 1-30 35 single crochet, 1 tch, turn
Finish with a chain, tighten and break the yarn. Ends must be weaved in to these pieces before assembling, as there are holes 😉

The front piece
Start: Use hook 3.5 mm, and chain 39 + 1 tch, turn.
ROW 1-3 2 pt, 6 dc, (1 chain, skip 1 s, 7 dc) 4 times, turn
ROW 4 2 pt (1 chain, skip 1 s, 1 dc) 19 times, turn
ROW 5-15 Now you repeat row 1-4, till you reach 15 rows in total. If this is confusing, take a look at the picture for help.
Finish with a chain, tighten and finish off.
Crochet the pieces together
Start
Hold the pieces together, so you have the front piece facing you. Insert the crochet hook through both pieces and crochet the pieces together with sc all the way around.
The corner
When you get to the corner crochet 2 sc together in the last stitch, turn around the corner, crochet 2 sc again on the other side of the corner. It gives the nicest edge.
(Here shown with Annemette’s Bobble-Potholder – It’s the same.)

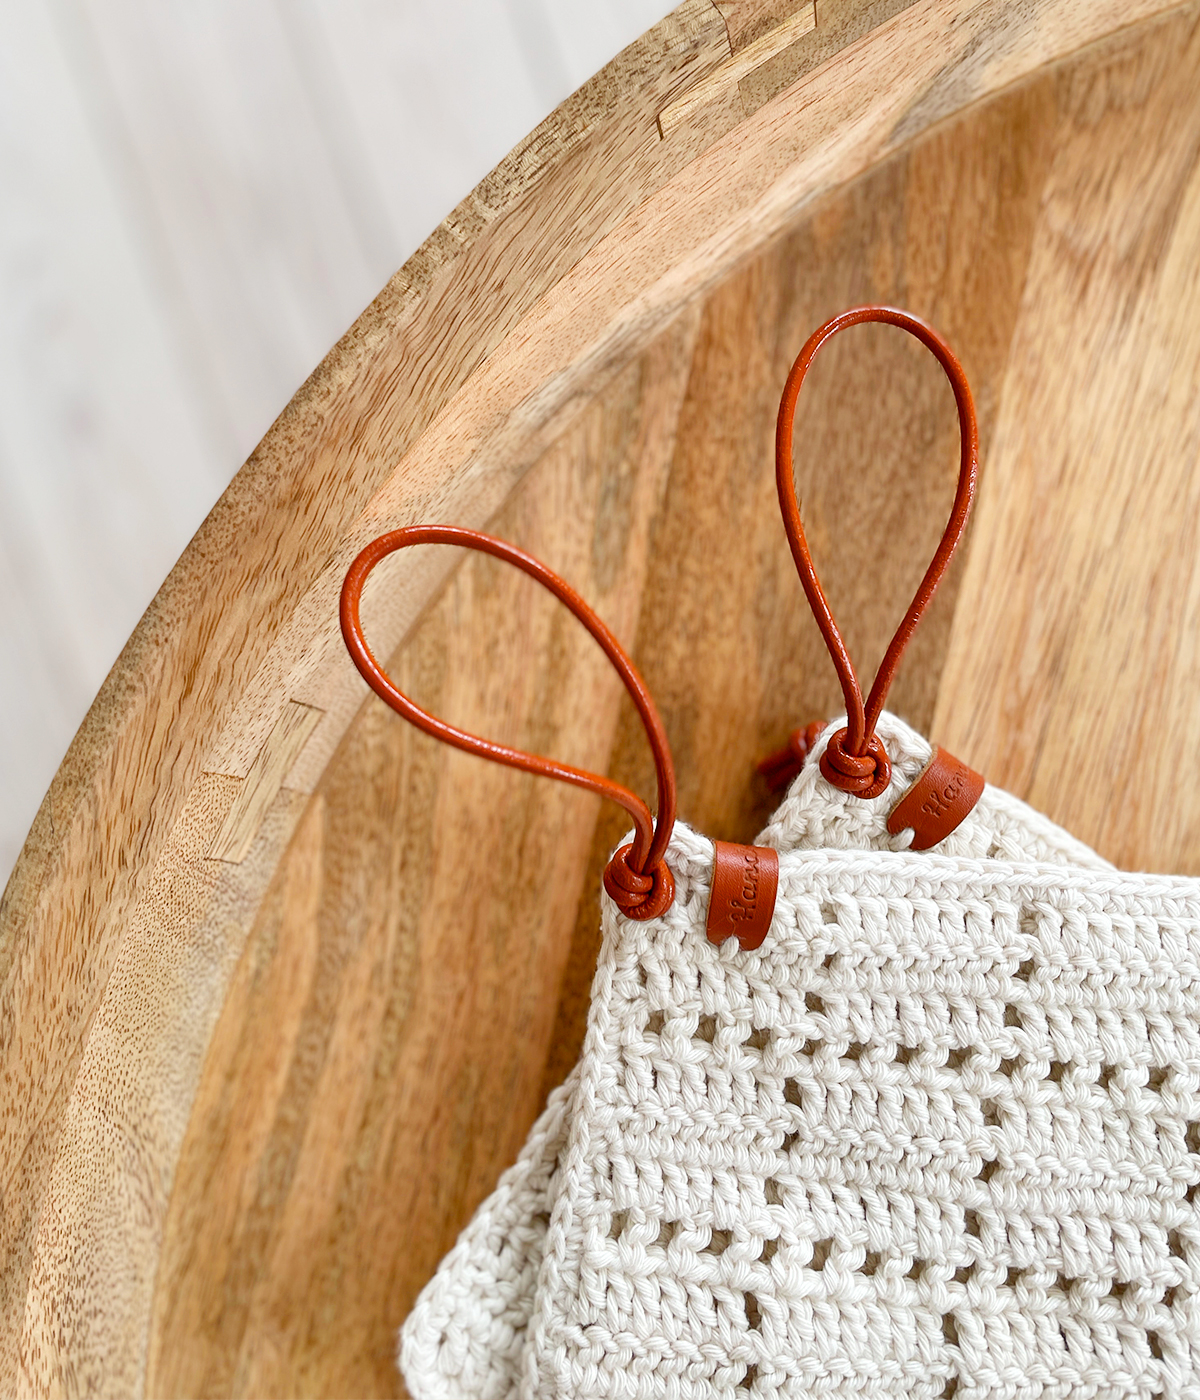
Leather on!

(Again here with Annemette’s Bobble-Potholder, as it’s the same 🙂 )
Now the strap and tag must be attached. It’s easiest to start with the strap, and then place the tag after it.
The strap can be a bit of a bandit, so here a pair of pliers is a pretty good aid.
Take a larger crochet hook or something round and a little thick. Insert it through the corner, where you want the strap to be, to widen the hole, and let it sit there for a bit.
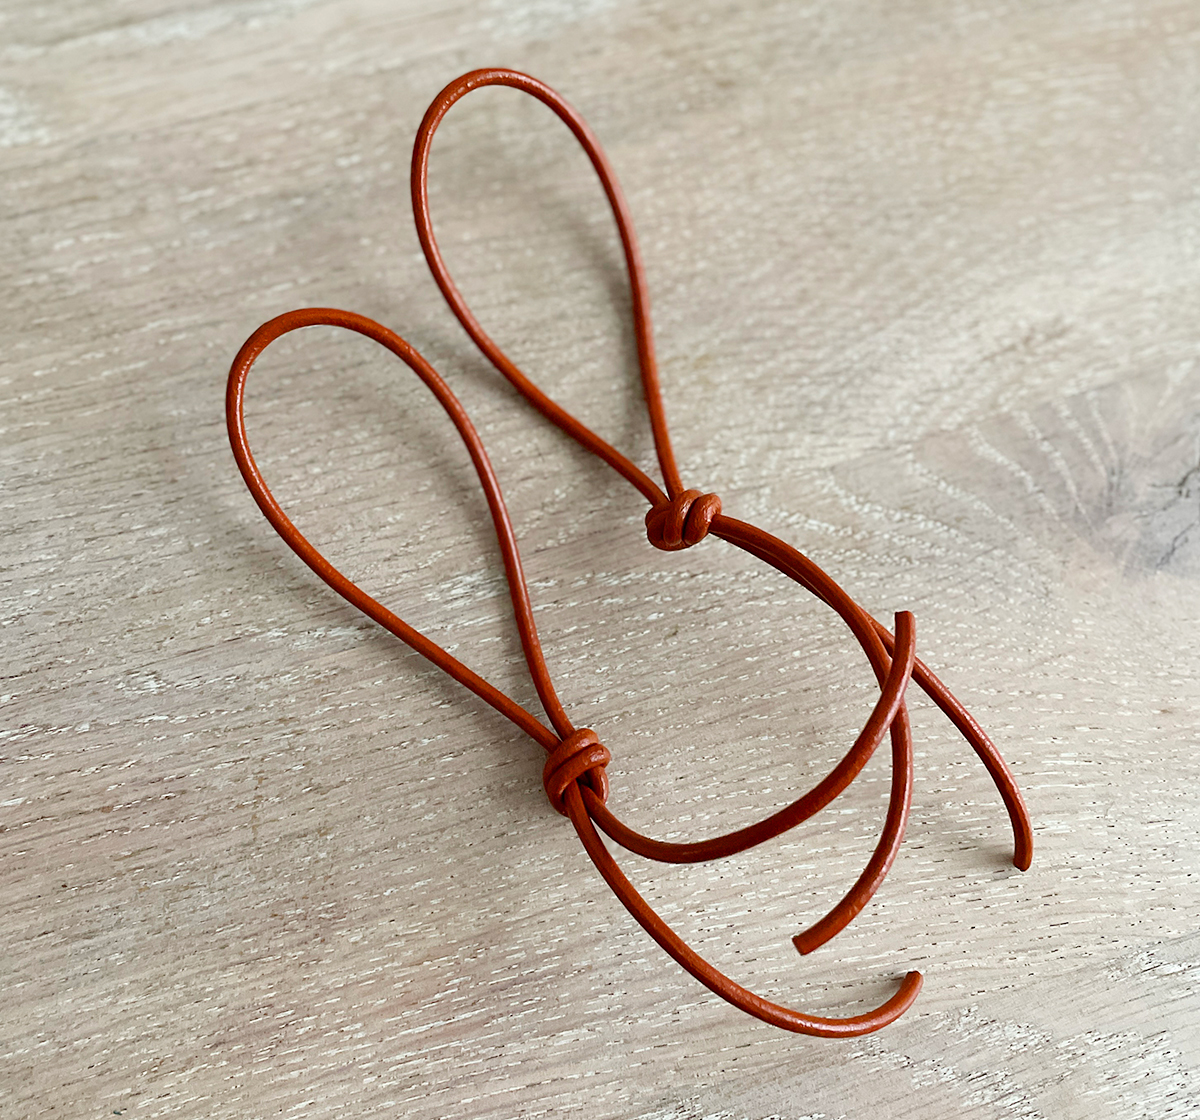
Cut off the length you want. I cut 50 cm, so I have enough for knots and don’t waste too much. Tie a knot, so that the strap is 7-8 cm in height.

Pass the ends through the hole. You can use pliers to get it pulled through, and tie a knot on the other side. Cut off the excess leather ends.

Sew the “Handmade”-leather tag in and da da da daaaaaa: It’s done!  You now have you own set of the “Chef’s Potholder”!
Here you find some helpful videos, so you can make the pattern. Especially if you are a beginner (If you are: You’re awesome – am cheering for you!). It’s a bit easier to understand with live pictures  Milla Billa made the design and editing. Music was by www.bensound.com.