About The COMPLETELY round basket
I love homemade baskets. You can use them for everything, and this one I choose to use as a breadbasket. It is so nice with yarn on the breakfast table, and this is completely simple and nicely round. Most often baskets become hexagonal if you do not get your increases randomly shifted. You don’t get that here. It becomes completely fine and round, and with a good leather label on, it gets a beautiful finish 🧡
(Scroll down for the free version on the page here)
Time to make: 1 hour and 15 min.
Skill level: Easy
Size: D 20 cm and H 10 cm


For this pattern on The COMPLETELY round basket you need to be able to make a magic ring – crocheted in spiral, single crochet and an invisible finish. Super simple.
Don’t worry 🙂 There are video guides for it all. Click on the links or scroll to the bottom to find them.


Støt Milla Billa
Hvis du finder glæde ved mine opskrifter og og kan bruge mit indhold, kan du støtte op om Milla Billa lige her – så kan jeg blive ved med at lave skønt indhold til dig. Læs mere om, hvorfor de gratis opskrifter er så vigtige for mig, ved at klikke herunder.
På forhånd mange tusinde tak 🙏❤️🤗


Pattern
The COMPLETELY round shape
When crocheting circles normally, they end up being hexagonal, because the increases are on top of each other. Here in the pattern on The COMPLETELY round basket they are shifted – without laying in a system. That’s why they become completely round, because the increases are staggered.
Increases
An increase is 2 single crochet in the same stitch. This expands the shape and you get the beautiful round crochet basket.
Start with hook 5 mm and 2 threads of yarn at the same time. It may be a little hard on the fingers, but it gives a nice thickness.
ROUND 1 A magic ring with 6 single crochet (sc) (6 sts)
ROUND 2 Increase (inc) 6 times (12 sts)
ROUND 3 (1 sc, 1 inc) 6 times (18 sts)
ROUND 4 (1 sc, 1 inc, 1 sc) 6 times (24 sts)
ROUND 5 (3 sc, 1 inc) 6 times (30 sts)
ROUND 6 (1 sc, 1 inc, 3 sc) 6 times (36 sts)
ROUND 7 (5 sc, 1 inc) 6 times (42 sts)
ROUND 8 (2 sc, 1 inc, 4 sc) 6 times (48 sts)
ROUND 9 (7 sc, 1 inc) 6 times (54 sts)
ROUND 10 (4 sc, 1 inc, 4 sc) 6 times (60 sts)
ROUND 11 (9 sc, 1 inc) 6 times (66 sts)
ROUND 12 (5 sc, 1 inc, 5 sc) 6 times (72 sts)
ROUND 13 (1 sc, 1 inc, 10 sc) 6 times (78 sts)
Stop here if you want it in D 20 cm. I have made the following rows for you, if you would like the larger 🤗
ROUND 14 (4 sc, 1 inc, 8 sc) 6 times (84 sts)
ROUND 15 (13 sc, 1 inc) 6 times (90 sts)
ROUND 16 (7 sc, 1 inc, 7 sc) 6 times (96 sts)
ROUND 17 (3 sc, 1 inc, 12 sc) 6 times (102 sts)
ROUND 18 (12 sc, 1 inc, 4 sc) 6 times (108 sts)
ROUND 19 (17 sc, 1 inc) 6 times (114 sts)
ROUND 20 (6 sc, 1 inc, 12 sc) 6 times (120 sts)
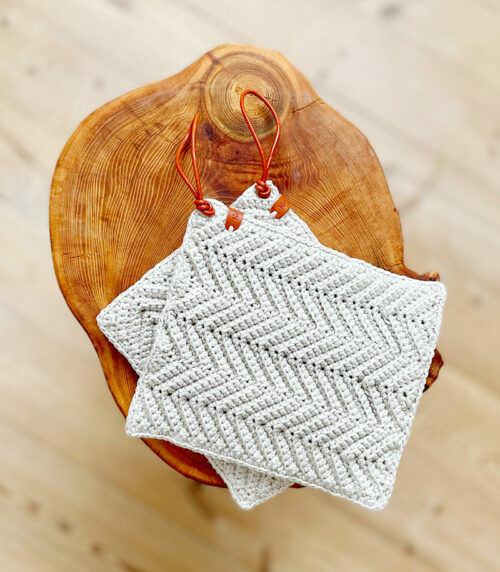
B-e-a-utiful potholder, that matches
I love matching sets, and if you choose potholders and breadbaskets in the same color, they are a beautiful pair. Here are my most popular potholder patterns ❤️


The edge
Now you turn around and crochet the edge. Some slip stitches are used to turn, and they should not be crocheted in again, so they do not count in the number of stitches. The stitches in which the slip stitches are put, must be crocheted in again, so it’s a good idea with markers so you do not overlook them 🙂
STEP 1
Make a slip stitch in the next stitch and tighten it well.
STEP 2
Turn – you do that, so the right side is out.
STEP 3
Make single crochet in the back loops only the whole round (remember the stitch, you put the slip stitch in from round 1 – that is the last stitch in this round, and you make one in that one too). This gives you a nice edge, that is pressed upwards. TIP: Put a stitch marker in the first stitch.
STEP 4
Make a slip stitch in the next stitch, that you tighten well. You do that to finish the round of single crochet in back loops only nicely.
STEP 5
Pull a little in the loop (to avoid making turning chains) and crochet single crochet (normal single crochet = in both loops) the whole round, till you reach the wanted height. The first single crochet is made in the same stitch as the slip stitch from step 4. When you get back to the slip stitch from step 4, you skip it. I made 14 rounds to get a height of 10 cm.
Here you find some helpful videos, so you can make the pattern. Especially if you are a beginner (If you are: You’re awesome – am cheering for you!). It is a bit easier to understand with live pictures  Milla Billa made the design and editing. Music was by www.bensound.com